I’ve mostly used Eclipse for my Java work. Today I’ve configured Eclipse to build, run and debug my C++ project built on Waf.
Waf build tool is not natively supported in current latest Eclipse (Luna Eclipse), so hopefully this entry helps someone trying to achieve the same configuration. I am running Luna Eclipse on Ubuntu 12.04. The C++ project I am using here to demonstrate the configuration is sferes.
1. Let’s first import our C++ project by creating an empty project and import the source code:
Select File > New > C++ Project:
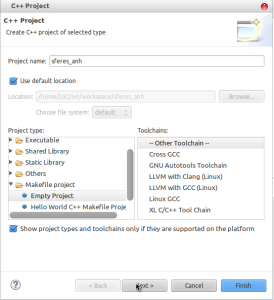
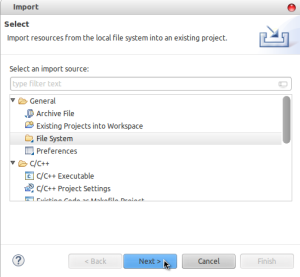
Import the source code to the project: Right-click to the project and select Import > General > File System
2. Configure the build toolchain to use Waf instead of the default make.
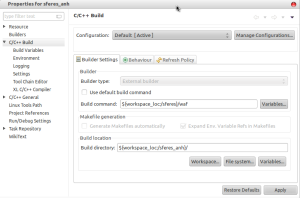
Right-click to the project, select Properties > C/C++ Build > Builder Settings:
Set the Build command to the path to your .waf file.
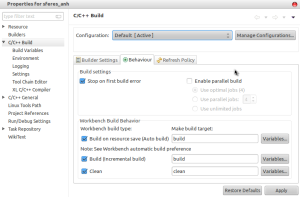
In the Behavior tab, set build and clean respectively as below:
The two build commands enabled would be:
- path/to/your/waf build
- path/to/your/waf clean
Now if you would be able to clean your project! Before you can build, the project needs to be first configured with ./waf configure –options… .
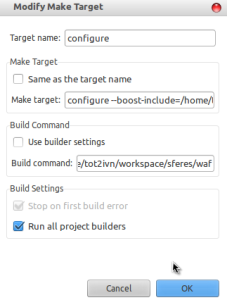
3. To enable ‘configure’ option, right-click to the project and select Make Targets > Create … > Create Make Target:
In make target, add your configuration options depending on the project. For sferes, it is:
configure –boost-include=/home/tot2ivn/src/sferes/include –boost-lib=/home/tot2ivn/src/sferes/lib –eigen3=/home/tot2ivn/src/sferes/include –no-mpi
Now you can configure, build, and clean your C++ project using Waf.
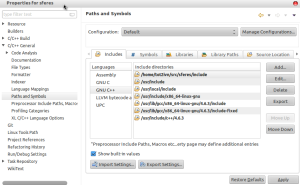
4. To allow Eclipse, default using GDB debugging tool, to debug your code. Add the paths to included sources. Right-click to the project, select Properties > C/C++ General > Paths and Symbols:
Now you can CTRL + click to navigate around the source code of your project.
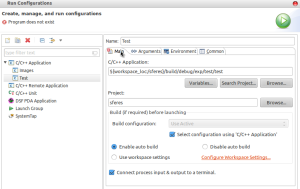
5. To run your compiled project, right-click to the project and select Run As > Run configurations > C/C++ Application and set the path to the executable of that you want to run:
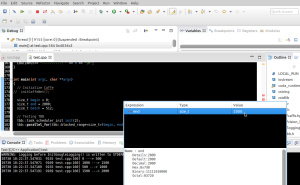
6. Finally, to debug the program, we can click the green bug icon to debug the program. The picture below shows the program is being stopped at a breakpoint:
I hope this guide helps someone trying to configure a similar C++ project built using Waf. :)
Cheers!
